Leave Your Message

How to Choose the Best Kitchen Food Composter?

Choosing the best Kitchen Food Composter is less about finding the largest machine. It is about matching the system to daily habits, available space, and food waste volume. A small apartment kitchen may need a quiet countertop unit with a sealed lid. A busy family may need a larger electric composter or outdoor system. The wrong choice can mean odors, fruit flies, overflowing bins, or unused equipment.

Kathleen Draper, a vermicomposting specialist and co-author of The Worm Farmer’s Handbook, describes vermicomposting as “a managed ecosystem.” That idea matters when comparing a Kitchen Food Composter. Effective composting depends on moisture, airflow, temperature, and the correct balance of food scraps. A unit that handles coffee grounds well may struggle with wet melon rinds. Some models dry and grind scraps, while others rely on microbes, worms, or natural decomposition. Their results are not identical.

Look beyond attractive buttons. Check the noise level beside a sleeping area. Measure the counter before ordering. Examine cleaning steps, filter costs, cycle time, and energy use. Odor control is important, but it is not magic. Even a premium machine needs sensible loading and regular maintenance.

No option is perfect. That is worth admitting.

This guide will compare major composter types, explain their practical differences, and identify which features deserve attention. The best Kitchen Food Composter should fit real routines, not an idealized kitchen. A reliable choice turns yesterday’s vegetable peels, eggshells, and coffee grounds into a more useful resource with less mess.

How to Choose the Best Kitchen Food Composter?

Types of Kitchen Food Composters and How They Work

Kitchen food composters fall into several distinct categories, and each handles scraps differently.

Aerated bins rely on oxygen, moisture, and microorganisms to break peels and coffee grounds into compost. They need regular mixing and careful moisture control.

Worm composters use red worms to process soft food waste, producing castings for soil. They work quietly, but worms dislike oily foods, meat, and excessive heat.

Bokashi systems ferment scraps in an airtight bucket with microbial bran. The result is not finished compost, so it must mature in soil afterward.

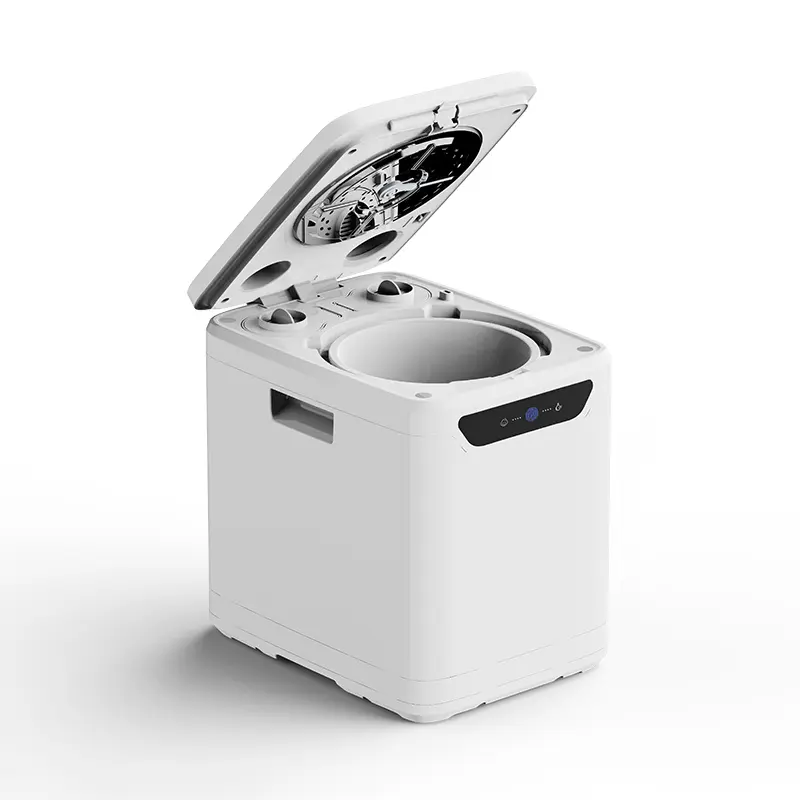
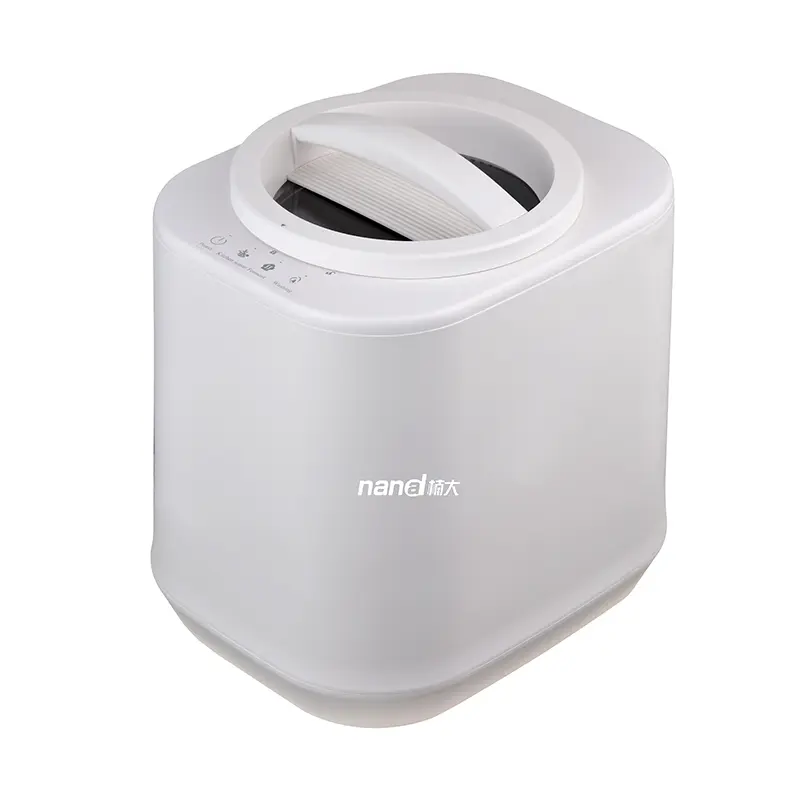
Electric composting appliances usually dry, grind, and heat food waste within hours. They reduce volume and odors, but their output may resemble a soil amendment rather than mature compost. Energy use also matters.

The U.S. Environmental Protection Agency reports that food waste represented about 24% of municipal solid waste landfilled in 2018. UNEP’s Food Waste Index Report 2024 estimates that households generated 631 million tonnes of food waste in 2022. Small choices can have measurable relevance.

For a small apartment, an electric unit or sealed fermenting system may suit limited space. A ventilated bin fits households with balconies, gardens, and time for maintenance.

In practice, incorrect moisture causes many failures: soggy mixtures smell, while dry mixtures stall.

I still question whether speed should outweigh soil quality.

A practical trial helps. Track odor, noise, electricity, cleaning effort, and the final material for two weeks before choosing.

Key Factors for Choosing a Kitchen Food Composter

How to Choose the Best Kitchen Food Composter?

Choosing a kitchen food composter starts with your daily food waste. A small household may need only a compact unit. Larger families require more capacity and fewer emptying cycles. Measure your counter space before buying. I once underestimated this detail, and the appliance blocked a cupboard door.

Odor control matters in a warm kitchen. Look for a sealed lid, replaceable filters, and reliable ventilation. Noise is another practical concern, especially in open-plan homes. A quiet motor feels less intrusive during meals. Check the processing cycle and energy use carefully. Some machines finish quickly but consume more electricity. Others work slowly and suit users who plan ahead.

Maintenance often determines long-term satisfaction. Removable parts should be easy to wash, with no narrow corners trapping food. Confirm which scraps the composter accepts, because bones, liquids, and oily leftovers may cause problems. A clear instruction manual shows responsible product design. Independent safety testing and durable, food-contact materials add confidence. Temperature control also deserves attention, since stable heat supports consistent processing.

Still, no countertop composter eliminates waste completely. The final material may need proper outdoor composting or disposal. This part is easy to overlook. Think about your routine, cleaning tolerance, household size, and local waste guidance before choosing.

How to Match a Composter to Your Space and Lifestyle

How to Choose the Best Kitchen Food Composter?

How to Match a Composter to Your Space and Lifestyle

Start with your daily food waste, not the composter’s appearance. A single person may need only a compact countertop unit. A family cooking every evening may need a larger outdoor system. Measure the available space carefully. Leave room for opening the lid, cleaning the container, and carrying scraps safely.

An indoor electric composter suits people with limited outdoor space and irregular schedules. It usually reduces food scraps quickly, but it needs electricity and regular filter maintenance. A worm bin works quietly in a shaded area. It needs suitable bedding, steady moisture, and protection from extreme temperatures. Outdoor tumblers suit gardeners who can turn the drum and wait several weeks. They also need firm, level ground.

Think about your habits.

If you forget small chores, choose a simpler system with fewer controls. If you enjoy gardening, a worm bin or tumbler may provide more useful compost. Check which foods the system accepts, because rules differ widely. Some methods handle cooked food, while others require only plant scraps. Follow the operating instructions and local waste guidance.

Do not underestimate smell management. A wet, crowded container can become unpleasant within days. A dry mixture may slow decomposition. I would rather choose a smaller system that gets emptied regularly than a large one that becomes neglected. My first choice might still be imperfect, especially when cooking habits change. That is useful information, not failure.

How to Choose the Best Kitchen Food Composter? – How to Match a Composter to Your Space and Lifestyle

Composter Type Typical Footprint Usable Capacity Processing Time Suitable Food Scraps Space Requirements Daily Effort Odor and Pest Control Energy or Materials Needed Best Match Main Limitations
Countertop electric food recycler Approximately 25–35 cm wide and 30–45 cm deep; usually fits beneath standard kitchen cabinets. Typically 1–4 litres per batch, depending on the model and food type. Commonly 4–10 hours for drying and grinding. The output is not finished compost and normally needs further decomposition. Most fruit and vegetable scraps, cooked food leftovers, meat, fish, dairy, grains and small bones when permitted by the appliance instructions. Requires a dry indoor countertop location near a power outlet and enough clearance for the lid and ventilation. Low
Empty the collection area and clean the processing chamber regularly.
Usually low odor because the unit uses heat, airflow and a filter. Filters require periodic replacement. Electricity, replaceable filters and occasional cleaning supplies. Apartment residents, small households and people who want fast volume reduction without outdoor space. Uses electricity, has limited batch capacity and does not independently create mature compost for direct use in soil.
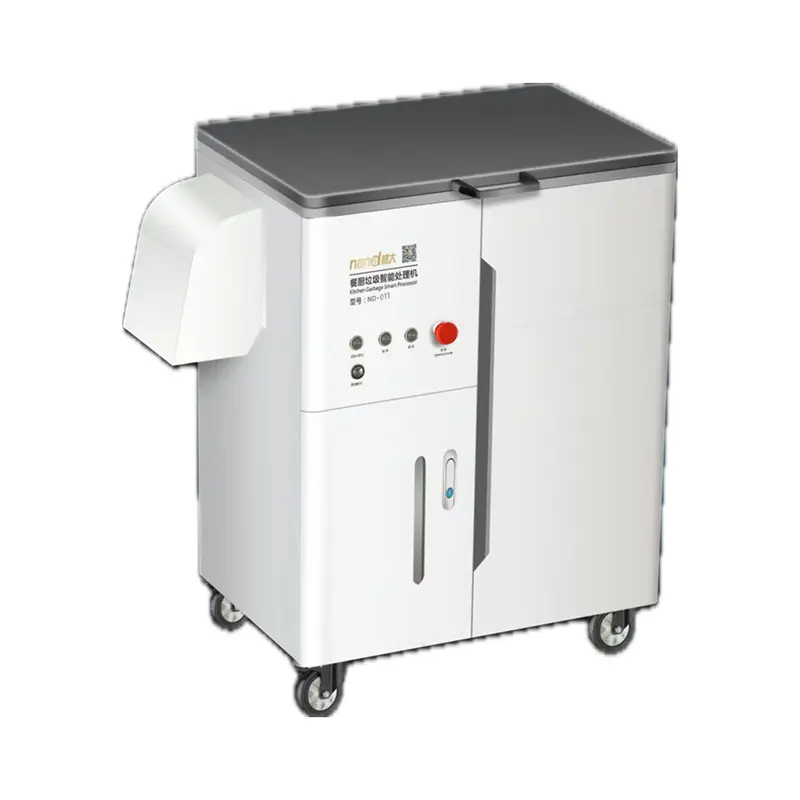
Under-sink or built-in electric composter Often about 30–45 cm wide, 45–60 cm deep and 45–75 cm high; exact dimensions vary greatly. Approximately 5–15 litres in the collection or processing chamber. Usually processes scraps over several hours to a day, followed by additional curing if the output is intended as a soil amendment. Commonly accepts plant scraps and some cooked food. Meat, bones, oils and dairy depend on the specific design. Needs cabinet space, ventilation, a nearby electrical connection and sufficient access for maintenance. Low to medium
Convenient for frequent use but requires installation planning and routine cleaning.
Generally good odor control when the filter, seals and ventilation system are maintained correctly. Electricity, filters and installation space; plumbing is not always required. Remodeling projects, high-volume kitchens and households that prefer appliances to remain off the countertop. Higher installation complexity, less portability and limited compatibility with existing cabinets.
Indoor worm bin Commonly 40–60 cm wide, 30–45 cm deep and 30–60 cm high. About 10–40 litres for a household-sized system, depending on the number of trays and worms. Approximately 2–4 months for usable worm castings under suitable conditions. Fruit and vegetable scraps, coffee grounds, tea leaves, crushed eggshells and small amounts of plain grains. Needs a shaded, temperature-stable indoor or sheltered outdoor location. Avoid direct sunlight and extreme heat or cold. Medium
Feed small amounts, bury scraps, monitor moisture and harvest castings periodically.
Low odor when bedding is balanced and food is not overfed. Fruit flies may appear if scraps are exposed. Worm bedding such as shredded cardboard, moisture and a starter population of composting worms. Eco-conscious households, small gardens and users who want nutrient-rich castings in a compact system. Cannot handle large amounts of food, meat, dairy, oily foods or citrus-heavy diets. Worms are sensitive to unsuitable temperatures.
Sealed bokashi fermentation bin Usually 25–35 cm wide and 30–50 cm high; designed for a pantry, utility room or balcony. Typically 10–20 litres per bucket. Fermentation usually takes about 2 weeks in the sealed bucket. The fermented material then needs burial or further curing. Most cooked and uncooked food scraps, including meat, fish, dairy and small amounts of oily food. Requires an indoor or sheltered location away from direct sunlight, plus a place to bury or cure the fermented material. Medium
Add inoculated bran, press out air, drain liquid and keep the lid tightly sealed.
Normally produces a sour, pickled smell rather than a rotting odor. Leaks and excess liquid can cause nuisance odors. Bokashi bran or another effective-microorganism inoculant; liquid may need dilution before garden use. Households that produce cooked food waste and have access to garden soil, a planter or a second curing container. Fermentation is not complete composting. The material must finish decomposing in soil or another composting system.
Outdoor compost tumbler Commonly 60–100 cm wide, 60–100 cm deep and 80–120 cm high, including the support frame. Approximately 100–300 litres for a household model. Often about 6–12 weeks when moisture, aeration and the carbon-to-nitrogen balance are well managed. Fruit and vegetable scraps, coffee grounds, grass clippings, dry leaves and other suitable plant-based materials. Needs a level outdoor surface with room to rotate the drum and access to dry carbon materials such as leaves or shredded cardboard. Medium
Load balanced materials, monitor moisture and turn the drum regularly.
Good pest resistance when closed. Odor usually indicates excess moisture, too much nitrogen-rich material or insufficient airflow. No electricity; requires a steady supply of carbon-rich browns and occasional water. Homeowners with a yard, moderate food-waste volume and a preference for faster turning than a static pile. Limited capacity, can become heavy when full and may not heat evenly enough to destroy weed seeds or pathogens.
Outdoor static compost bin Commonly 60–100 cm wide and 80–120 cm high, depending on the design and capacity. Approximately 200–800 litres for household bins. Usually 3–12 months, depending on particle size, moisture, aeration, temperature and the carbon-to-nitrogen balance. Plant-based kitchen scraps, leaves, grass clippings, garden trimmings and shredded untreated paper or cardboard. Requires outdoor ground space, some protection from excessive rain and access to both food scraps and dry brown materials. Medium
Layer materials, maintain moisture, aerate occasionally and remove finished compost.
Can be low odor with proper balance. An open or poorly managed bin may attract rodents, flies or other pests. No electricity; needs carbon-rich materials, moisture and occasional aeration. Gardens with regular yard waste, larger households and users who want to make genuine compost at low operating cost. Slower than electric systems, requires more space and may be affected by seasonal temperature changes.
Compost pile or three-bin system Usually requires at least 1–2 m² of ground area; a three-bin system needs additional working space. Approximately 500–1,500 litres or more, depending on the available area. About 3–18 months. Active, well-managed piles can finish faster than neglected piles. Plant-based kitchen scraps, leaves, grass, pruning waste, straw and shredded untreated paper or cardboard. Needs outdoor space, access for adding materials and enough room to turn or transfer the pile. Medium to high
Requires regular balancing, moisture control and turning or transferring between bins.
Can be low odor when correctly managed. Open piles have the greatest exposure to pests and weather. No electricity; requires substantial carbon-rich material and optional tools such as a fork or aeration tool. Large gardens, households with significant yard waste and users prioritizing capacity and low cost. Needs the most space, has variable processing times and requires consistent management to avoid odors or pests.

Important distinction: Drying, grinding or fermenting food scraps reduces their volume but does not always produce finished compost. For direct garden use, follow the system’s curing instructions and ensure the material has fully decomposed.

Practical selection rule: Choose by available space first, then match the system to your food-waste volume, acceptable maintenance level, access to outdoor soil and willingness to use electricity or consumable materials.

Features, Maintenance, and Odor Control to Consider

How to Choose the Best Kitchen Food Composter?

A reliable kitchen food composter should control moisture, airflow, temperature, and capacity. These features affect maintenance more than appearance. The 2024 UNEP Food Waste Index reported 1.05 billion tonnes of food waste in 2022. Households produced about 60% of it. Even a small countertop unit can reduce daily scraps, but only with proper operation.

Look for a sealed lid, replaceable odor filters, and a removable inner container. Carbon filters help, but they are not magic. A balanced mix of wet scraps and dry carbon material limits anaerobic smells. Avoid adding excess liquid, meat, oily food, or large pieces unless the instructions permit them. The U.S. Environmental Protection Agency reports that food waste represented approximately 24% of municipal solid waste in 2019. That scale makes simple maintenance habits meaningful. Empty the container before it becomes heavy, rinse it weekly, and dry it completely. I sometimes prefer a smaller chamber. It encourages frequent emptying.

Tips: Keep a small layer of shredded paper or dry leaves beneath fresh scraps. Wipe the lid seal after each use. If an earthy smell becomes sour, inspect moisture and airflow first. A filter may need replacement sooner than expected in warm kitchens. Do not trust “odor-free” claims without checking independent testing details. Certification helps, but real performance depends on household habits, room temperature, and cleaning discipline.

How to Compare Costs, Capacity, and Environmental Benefits

Choosing a kitchen food composter requires more than comparing purchase prices. I once focused only on the cheapest unit and ignored electricity, filters, and cleaning time. That comparison was incomplete. Add the purchase cost, monthly energy use, replacement parts, and your local disposal fees. A small household may need only 0.5 to 1.5 litres daily. Larger families can exceed 2 litres, especially after cooking vegetables or serving leftovers.

Capacity should match your actual routine, not an optimistic estimate. The UNEP Food Waste Index Report 2024 estimates that households wasted 631 million tonnes of food in 2022. This shows why convenient storage and regular processing matter. However, a larger chamber is not automatically better. It may occupy valuable counter space and encourage longer storage. The U.S. Environmental Protection Agency identifies food as a major component of landfill waste and a significant methane source. Environmental benefits depend on proper use, energy consumption, and what happens to the processed material afterward. Some devices reduce volume but do not create finished garden compost. That distinction is easy to miss.

Tips: Compare capacity with one week of real kitchen scraps. Check wattage, filter costs, noise, and cleaning requirements. Prefer transparent test data over dramatic carbon claims. WRAP research also links food waste reduction with better household planning, so measuring leftovers may deliver greater savings than buying a larger machine. I still question my own estimates, because seasonal cooking changes waste levels. A practical trial often reveals more than a glossy specification sheet.

How to Choose the Best Kitchen Food Composter?

Compare representative non-brand options by purchase cost, yearly operating cost, working capacity, and estimated monthly food-waste diversion.

Electric countertop composters are compact but typically have the highest purchase and energy costs. Bokashi buckets and worm bins use little or no electricity, while outdoor tumblers offer the greatest capacity for households with outdoor space. Estimates assume regular use, suitable moisture and temperature, and average household food scraps; actual performance varies by model, climate, and user habits.